Links below are affiliate links. We earn a commission on purchases at no extra cost to you.
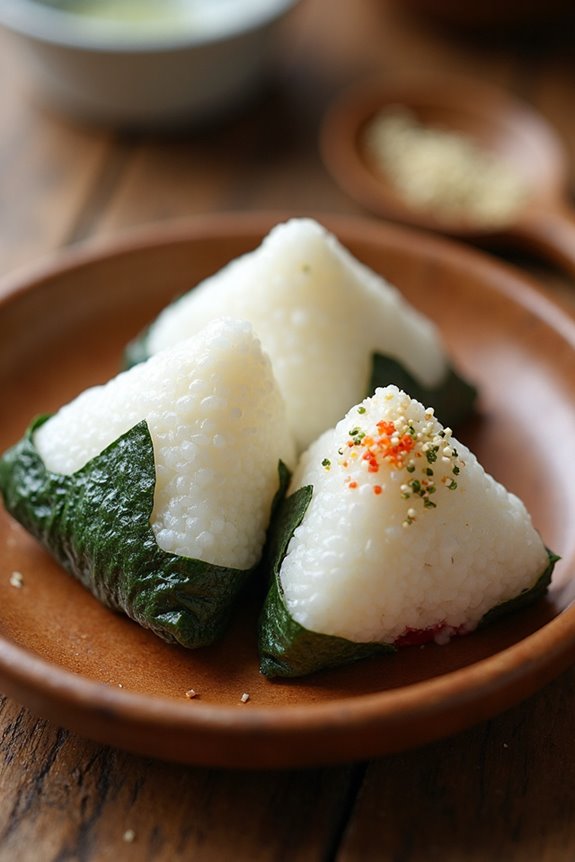
Homemade Japanese Onigiri Rice Ball Recipe
Learn how to craft delicious homemade Japanese onigiri rice balls with simple ingredients and versatile fillings that will delight your taste buds.
Why You’ll Love these Japanese Onigiri Rice Balls
Onigiri, those little rice balls packed with flavor, are way more than just a snack—they’re a mini adventure for your taste buds.
Think simple rice transformed into a handheld delight, bursting with surprises inside. They’re perfect for when you want something filling but not complicated, and honestly, who doesn’t love a food that’s both easy and fun to eat?
Plus, they’re super versatile—sweet, savory, spicy—you name it. And here’s a secret: shaping onigiri is oddly satisfying, like a stress ball but tastier.
They’re portable too, making them ideal for lunchboxes or a quick bite on the go. If you crave comfort food with a twist, onigiri hits the spot every single time.
What Ingredients are in Japanese Onigiri Rice Balls?
Alright, let’s talk ingredients—because the magic of onigiri starts right here. You might think it’s just rice and some random stuff tossed inside, but nope, it’s way more deliberate and fun than that. The base is super simple: good quality cooked rice, a little seasoning to jazz it up, and then a filling that does the heavy lifting, flavor-wise.
You may be interested

Oh, and don’t forget the nori, that crispy seaweed wrapping that’s basically the onigiri’s best friend. Ready to see what goes into making these tasty little rice balls?
Here’s what you’ll need:
- 2 cups cooked rice, cooled slightly
- 1/4 cup rice seasoning (furikake is a great choice)
- Water, as needed (for wetting your hands and bowls—trust me, it helps!)
- Salt, to taste (a pinch or two for seasoning and shaping)
- 2 sheets nori, cut into squares (for wrapping or picking up)
- 1/2 cup tuna mixed with Japanese mayonnaise (a creamy, savory filling)
- 1/2 cup umeboshi (that’s Japanese pickled plum, tangy and a bit salty)
- 1/2 cup finely chopped BBQ chicken or pork (for a meaty punch)
- 1/2 cup scrambled egg mixed with soy sauce (for a soft, umami twist)
Now, before you rush to combine everything, a couple of pointers: the quality of your rice really makes or breaks onigiri, so use short-grain or sushi rice if you can—they stick together better and give you that perfect texture.
Also, the fillings? They’re super flexible. Don’t sweat it if you don’t have umeboshi lying around; swap it for pickled veggies or whatever tangy flavor you like.
And the nori—pro tip—don’t let it touch the rice too early or it gets all soggy and sad. Keep it crispy until the last minute, and your onigiri experience will be way more satisfying. Simple ingredients, but when they come together, it’s magic.
How to Make these Japanese Onigiri Rice Balls
Making Japanese onigiri rice balls is easier than you might think, and it’s kind of fun—like edible origami, but tastier. Start with 2 cups of cooked rice, which should be cooled slightly so it’s warm but not hot. If you want, you can mix in 1/4 cup of rice seasoning (furikake) to give your rice an extra burst of flavor, but that’s totally optional.
The key trick here is to keep your hands and the small bowl you’ll be using wet—water helps prevent that sticky rice from clinging to your fingers like an overenthusiastic toddler. Once your hands are ready, sprinkle a little salt on them or in the bowl to add a subtle seasoning punch.
Now, scoop a good handful of rice into the bowl, then press your thumb into the center to make a little well. This is where the magic happens—you’re going to add about 2 teaspoons of your favorite filling, whether it’s creamy tuna mixed with Japanese mayonnaise, tart umeboshi, finely chopped BBQ chicken or pork, or even scrambled egg with soy sauce.
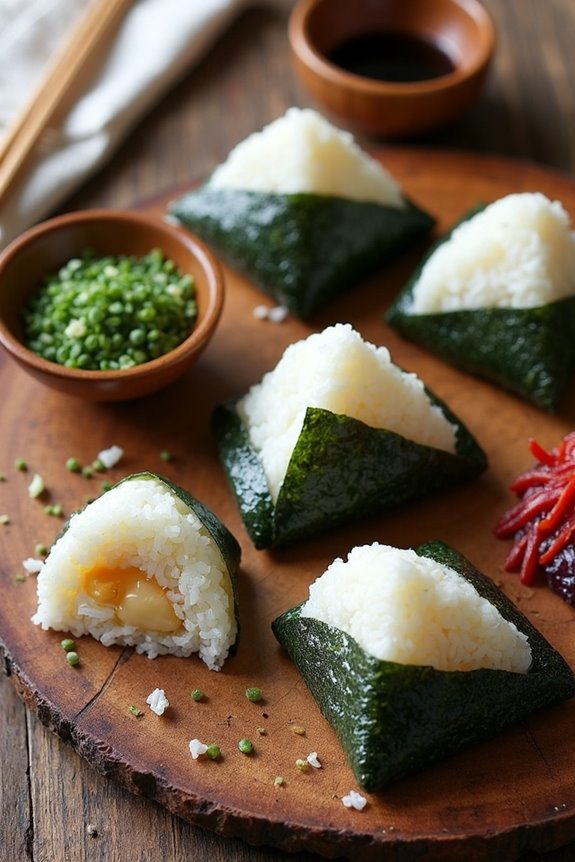
Cover that filling with more rice, then gently but firmly shape the whole thing into your desired form—triangles are classic, but hearts or balls work too if you’re feeling artsy. Just don’t squeeze too hard or your rice will lose its lovely texture.
The final touch is wrapping each onigiri with a square of nori (seaweed). This isn’t just for looks; it acts like a little handle, making these rice balls less messy to eat.
But here’s a heads-up: nori gets soggy fast if it touches the rice for too long or sits out exposed to air. So wrap them just before serving, or keep the nori and rice separate until you’re ready to eat.
Using a high-end dutch oven can also help you cook your rice evenly and retain moisture, resulting in perfect rice balls every time.
And there you have it—a simple, satisfying snack that’s as customizable as your favorite playlist. Give it a go, and maybe keep some napkins nearby—rice balls can be deceptively messy when you’re first learning.

Savory blend of toasted sesame seeds and nutrient-rich sea vegetables

All-in-one Bento Multifunction Cooking Tool - Cookie Cutter, Rice Mold, Sandwich Cutter and more
Japanese Onigiri Rice Balls Substitutions and Variations
Once you’ve got the hang of shaping rice balls and stuffing them with tasty fillings, it’s fun to experiment with substitutions and variations that suit your mood, pantry, or taste buds.
Swap tuna mayo for spicy salmon or even cream cheese if you’re feeling adventurous. Instead of traditional umeboshi, try pickled radish or kimchi for a tangy twist.
Vegetarians, don’t fret—grilled shiitake mushrooms or avocado chunks make great fillings. Want to mix textures? Add crunchy tempura bits or toasted sesame seeds right into the rice.
Nori squares can be swapped with shiso leaves for a fresh herbal note. Honestly, the beauty of onigiri is its flexibility—rice, filling, seaweed, all open to your creativity.
Just make sure the rice stays sticky enough to hold everything together; that’s the real secret.

Waterproof and Splash-Proof: Made of 100% waterproof polyester with Japanese anime wave & funny dinosaur dino prints; effectively keeps water inside the tub; prevents splashes from reaching the bathroom floor; ideal for kids, mens or boys bathrooms with Asian-inspired decor

Professional Tamagoyaki Cooking Kit: The Fungyand Tamagoyaki Set includes a high-quality tamagoyaki pan, classic Japanese plates, a green bamboo curtain, a heat-resistant silicone spatula, and a sharp Japanese knife with a sheath; designed for effortless preparation of perfectly textured tamagoyaki

THE ULTIMATE SUSHI MAKING KIT: Elevate your sushi-making skills with this complete sushi making kit; includes 7 essential tools for crafting sushi rolls, Nigiri, Gunkan, Musubi, Onigiri, and more; cutting mold ensures perfectly shaped sushi every time
What to Serve with Japanese Onigiri Rice Balls
Choosing what to serve with Japanese onigiri rice balls can turn a simple snack into a full-on meal that hits all the right spots.
Think miso soup—warm, comforting, and just the right saltiness to balance the rice. A side of pickled veggies adds a zingy crunch that keeps things interesting.
Sometimes, a small salad with sesame dressing feels rejuvenating next to the dense, savory onigiri. Don’t overlook edamame; they’re easy, protein-packed, and fun to pop out of their pods, making you feel fancy without trying too hard.
If you want a bit of sweetness, fruit slices like orange or apple can cleanse your palate.
Trust me, pairing these thoughtfully turns your onigiri from “just rice balls” into a satisfying, well-rounded meal.
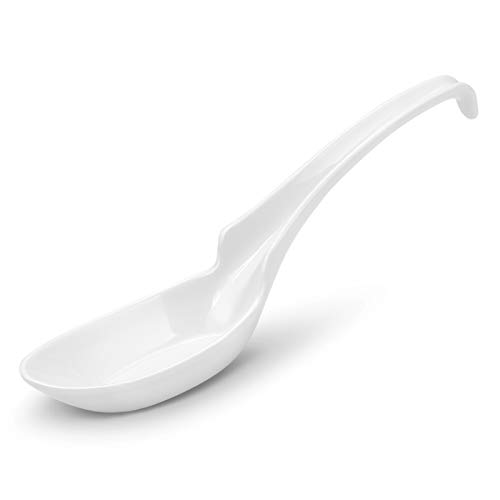
FOOD-GRADE MATERIAL & DISHWASHER SAFE: Food-grade melamine materials have the texture and durability of ceramics, as well as the light weight and toughness of polymer. Smooth and shiny surface feels great to hold and easy to clean. Completely dishwasher safe in low temperature cycle.

Size: φ11.5 × H6.5cm × 5 pieces

The soup spoon has two round handles of different lengths to choose from
Final Thoughts
After picking out the perfect sides to accompany your onigiri, it’s time to reflect on why these little rice balls have such staying power in kitchens worldwide. They’re simple, versatile, and downright comforting — who knew rice could be this exciting?
The magic lies in the balance: fluffy rice, savory fillings, and that crisp nori wrap, all working together to make every bite satisfying. Plus, they’re portable, making them perfect for lunchboxes or quick snacks.
Sure, shaping them neatly can be a bit tricky at first — fingers getting sticky, fillings escaping — but that’s part of the charm. With a bit of practice, onigiri turns into a fun, hands-on meal that doesn’t feel like a chore.